Setting up spaces (start pages) and widgets
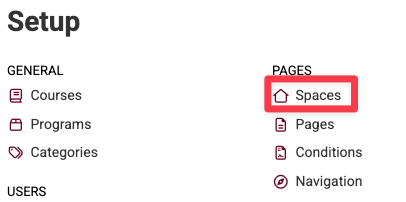
To set up a new space (formerly called Start page) go to the Setup section of your academy. Under Pages you will find the Spaces item.
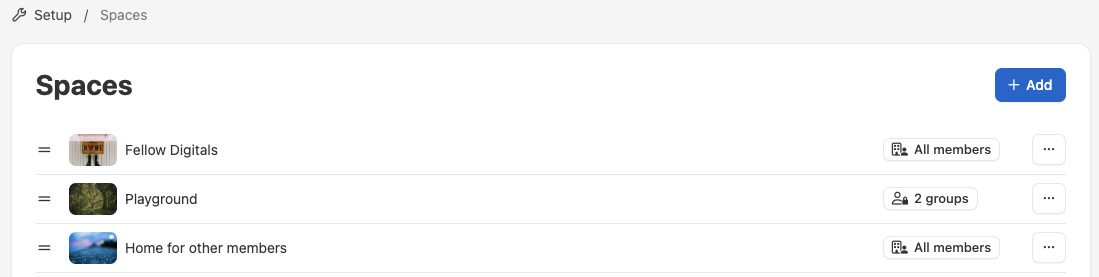
Creating new spaces
This is where you can now create one or more spaces, edit or delete them, and define which spaces are displayed to who.

Who starts in which space?
Fellow LMS follows the order you provide in the space overview. When a user logs in, it checks whether they have access to the first space on the list. If access is denied, it moves to the next space and continues this process until an accessible space is found.
This functionality allows different groups of members to be directed to their designated spaces seamlessly.
Note: This is particularly useful for frontline employees who need quick access to their assigned space, external collaborators who require platform access without visibility into internal company information, or organizations managing multiple brands with separate spaces.
Name and permission
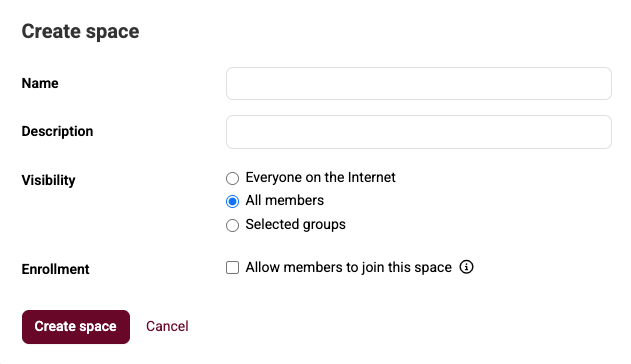
After clicking the + Add button, you can set a name and description for the space. The name will appear wherever users navigate to this space, so ensure it is clear and easily understood by everyone.
In some cases, providing an overview of spaces with descriptions can be useful. If so, be sure to add a description that clearly explains the purpose of the space.
Visibility
In the Visibility section, you can define who can see the space. You have the following options:
- Everyone on the internet – Open to everyone, like a public website.
- All members – Visible platform-wide, to all members of the platform.
- Selected group – Only accessible to one or more specific groups.
If a space is restricted to specific groups, others won’t even be aware of its existence. Navigation links to these private spaces will not be visible to users who are not part of the designated groups.
Editing layout of a space
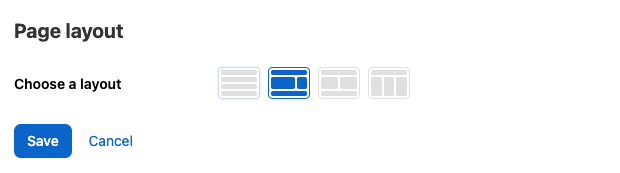
You can decide the layout that you want to have for your space. Next to the standard layout with blocks below each other there are options for layouts with 2 or 3 columns.

If you change the layout, the widgets will be placed in the new layout. You will have to rearrange the widgets to how it fits the best for your purpose.
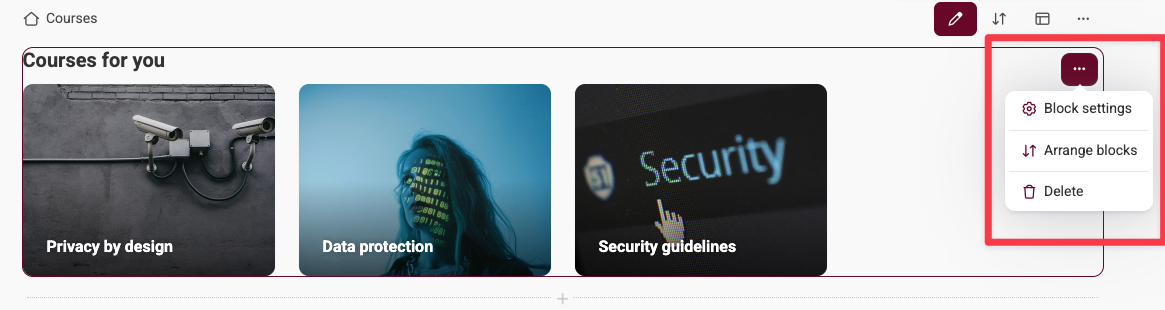
Rearrange widgets
You can sort widgets in an easy overview through "Arrange blocks" in the edit page mode. In the following screen you will get the option to sort the widgets easily in the preferred order.
Editing content of a space
To edit the content of a space, press Edit page
A space can be set up with a number of widgets or contentblocks to create the experience that you want. New content and widgets can be added at the desired position. Above or below existing blocks you have the possibility to add an extra widget or content block.
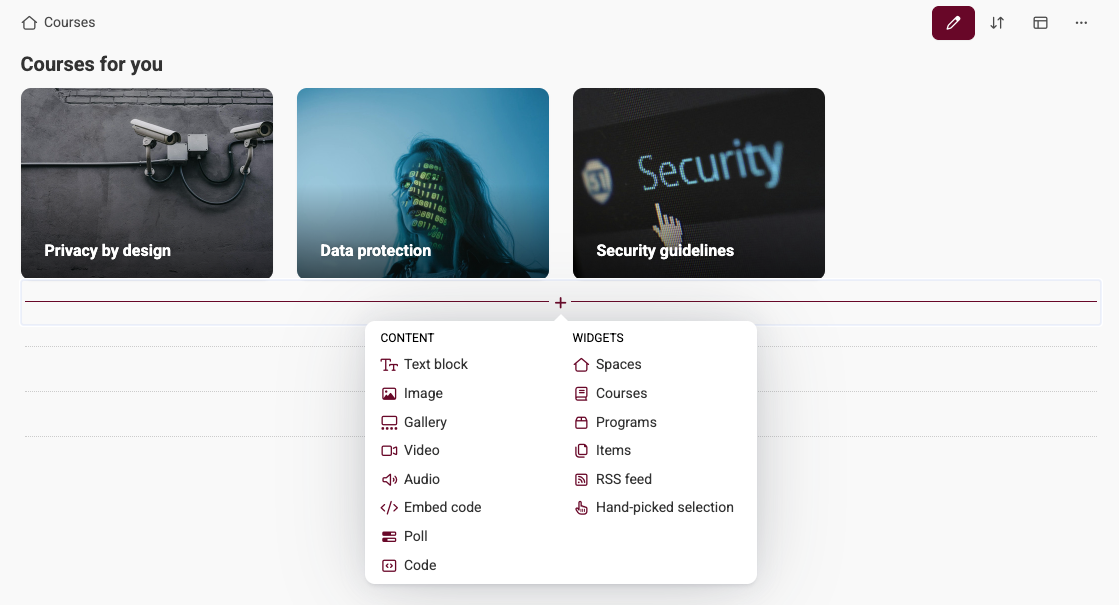
Adding an extra widget is done by pressing “+”
Change settings of a widget or content block
To edit the content of a widget or content block, click the three dots in the top-right corner of the block. The available editing options will vary depending on the type of widget you are using.
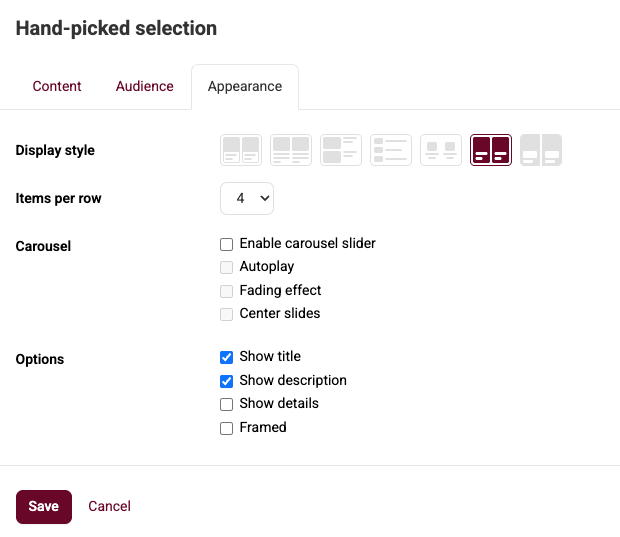
Widget and content block settings
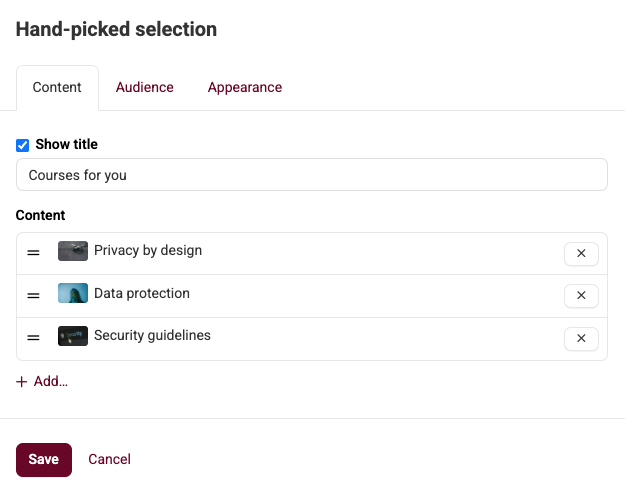
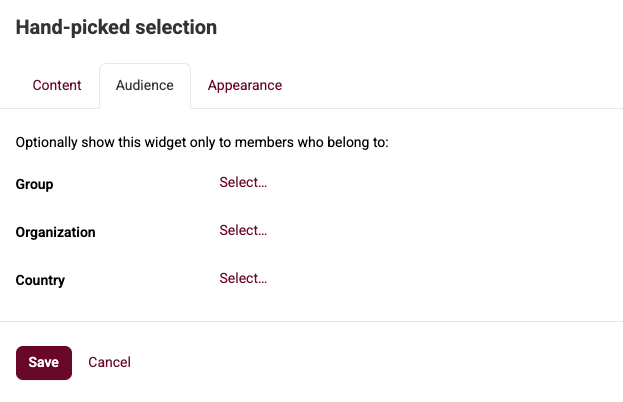
Each widget or content block has three tabs:
- Content Tab – Determines which content will be displayed.
- Audience Tab – Defines which members can see the widget or content block.
- Appearance Tab – Allows you to customize the layout of the block.
Application examples
A space can be used to…
- … show all available courses
- … only display wiki entries created with pages
- … list all live workshops
- … only display courses for management or other target groups