How do I invite participants to my courses?
2×4 ways to enroll on a course
At the start: Why 2×4 ways? It's simple: In Coursepath, there are 2 basic methods for adding participants to the academy or courses:
- Academy and course access for specific user groups - also possible via API/SSO
- Flexible via self-registration
Each of the first two methods have 4 further options for defining more precisely how course enrollment takes place. In the event of self-registration, participation in the course may be restricted or access authorization may be extended, for example. All methods are described in further detail below.
1. Academy and course access for specific user groups
To only invite specific user groups to your academies and courses, you have the following options:
- Practical and individual: Adding members with personal accounts
- Already a user in another system? Adding via Single Sign-On (API)
- How do members stay anonymous? Invitation with anonymous accounts
- Participant unknown? Invitation via voucher codes
1.1 Practical and individual: Adding members with personal accounts
If you have the e-mail addresses of the participants, it is easy to add them to the course by entering the address. Since the manual entry of multiple e-mail addresses quickly becomes time-consuming, you can alternatively upload an Excel or CSV file with all the desired participant data.
Tip: In your academy, download a list of participants as a template (e.g. via Options > Members > Download Excel). You can then fill the required fields and upload the edited list.
Additional tip: Changes can also be made quickly and easily to a participant list downloaded from Coursepath. If you then upload the edited list, Coursepath will recognize the changes and update the user data. An exception to this are changes to e-mail addresses: Changing an e-mail address creates a new user as it is the main characteristic of a user account. You can make changes to this directly in the member's profile (under "Edit member").
Individual invitation by e-mail
After entering or uploading the e-mail addresses, an individual invitation will be sent to the participants, the text of which you can adapt yourself. All invitations are sent using your academy's branding, providing high recognition value. The recipients of the e-mail then only need to click on the activation link and can then enroll on the course.
Variables for invitation e-mails
When you invite participants via e-mail, use variables to give these e-mails a more personal character. These variables are available for e-mails:
- {name}: Participant name
- {course}: Course name (only for course invitations)
1.2 Already a user in another system? Adding via API and Single Sign-On (SSO)
If you have set up an Active Directory (AD) in your company or are already using Single Sign-on (SSO) to log on to the intranet, for example, you can also use this method to log on to Coursepath. Participants who are already logged on to one of these systems are automatically logged on to Coursepath as well. As a result, Coursepath fits seamlessly into the existing system landscape.
Tip: You can also use API/SSO to have employees who no longer work for you automatically deactivated in Coursepath and have new employees enrolled in certain courses.
Developer area
You can find the Coursepath developer area with technical information here: https://developer.coursepath.com/
1.3 Members without an e-mail address or anonymous course participation
If there are participants without their own e-mail address or if training is to be conducted anonymously, participant accounts can also be added without an e-mail address (or other personal information). You can do this using the Anonymous Accounts option. Using aliases or pseudonyms guarantees anonymity. If there are a lot of users, you also have the option of adding them via an Excel or CSV file. To do this, simply leave the e-mail address field empty. Coursepath automatically creates user names based on what you enter in the Name field.
Tip: Would you like to determine the user names yourself? Simply enter the desired designation in the Excel column "E-mail / User name". Umlauts are not supported for user names.
Downloading access codes
After the upload, Coursepath automatically generates access codes. These are displayed in a text field for copying and are also available for download as an Excel spreadsheet. You can then forward this to your participants, who can use the codes in the LMS to create a password and log in directly. The next time you log in, you only have to enter the user name and the password you selected. The access code only has to be entered once.
Special considerations for anonymous accounts
A special consideration for this method is that because no e-mail address is used, the system is unable to send system messages such as automatic reminders. If the user forgets their password, you can create a new access code, which the user can then use to create a new password.
Tip: If it is necessary to convert an anonymous account to one with an email address, you can do this directly in the user profile.
Entering the access code
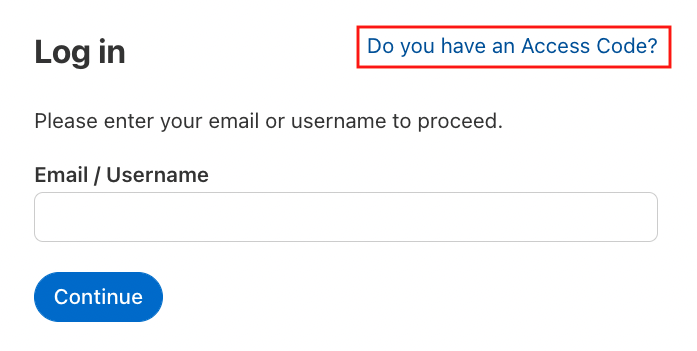
When the user logs in for the first time, the access code must be entered under "Do you have an access code?". The users then assign themselves a password.

1.4 Participant unknown? Invitation via voucher codes
Another way to invite participants to courses without an e-mail address is the voucher system. These voucher codes for course enrollment are easy to generate. If required, you can add labels and expiration dates to the voucher codes to generate any number of codes.
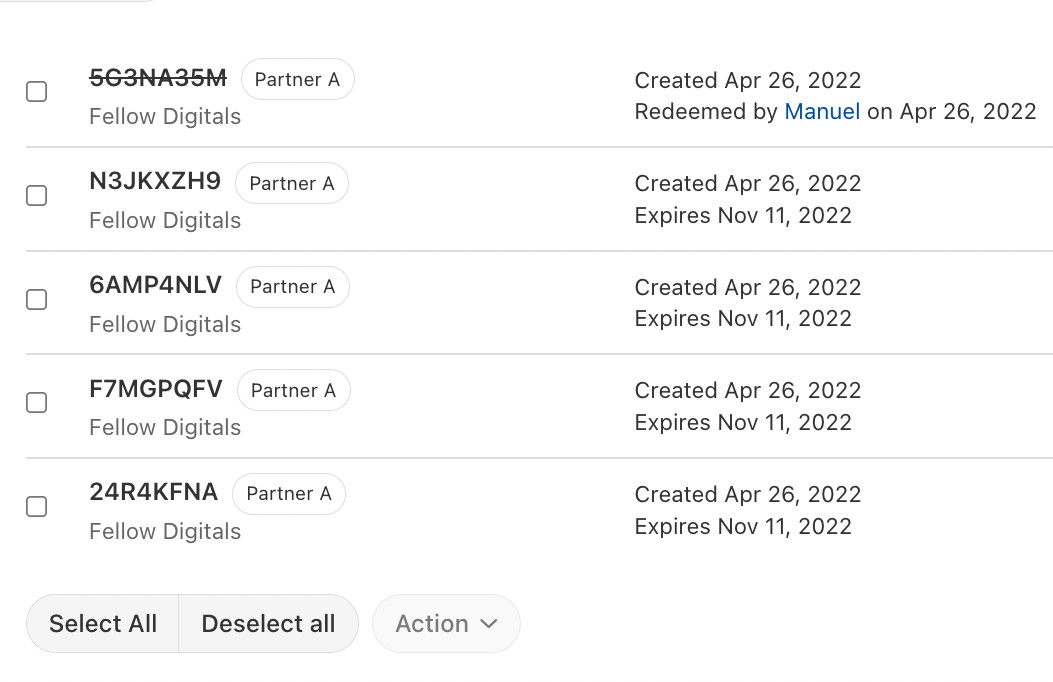
Using the voucher codes, recipients can create their own fully-fledged user accounts to which they can add their e-mail addresses. You can use the voucher menu to see which codes have already been redeemed and which are still open.
 Recipients can use voucher codes to create their own user accounts.
This option is only available at course level, voucher codes cannot be used for higher-level enrollment in the academy. However, upon enrollment in the course, a course participant automatically becomes an academy member and can enroll on other courses – where these are open to self-enrollment.
Voucher codes are perfect if you want to invite employees or partners whose e-mail addresses you do not know. You can then generate 100 voucher codes for partner A and 250 voucher codes for partner B, for example, and allow the partners to distribute and use the vouchers internally.
You can specify directly to which group the new participants should be added. This makes reporting and management easier.
Tip: Voucher codes do not count towards your user license. A user account will be created only when a voucher code has been redeemed. From that point, it will count towards your license.
2. Flexible self-registration
In addition to the default setting of “Invitation only”, you have the option to open courses for self-registration. Coursepath offers 4 different ways of doing this in the course options:
- Internal: Self-registration for academy members
- Flexible control: Self-registration via the Enroll button
- Offer courses to everyone? Open courses
- Offer paid courses? eCommerce/Store
 Course enrollment options. It is possible to invite participants manually with every option
2.1 Internal: Self-registration for academy members
In the course options you can open courses for existing academy members. Members can enroll themselves on other courses in the academy with no need for confirmation. As a trainer on the course, you will be informed about enrollments.
2.2 Flexible control: Self-registration via the Enroll button
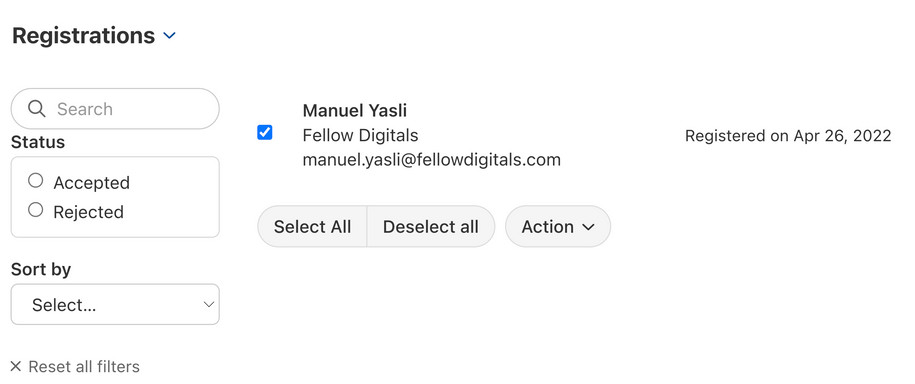
You have a little more control with the "Permission required" option. Interested participants can click on the enroll button to request participation in the course. The course content only becomes visible when a manager or assistant on the course has confirmed the request and approved the participant for the course. You have the option to deny access, if necessary.
 Registration requests can be accepted or declined.
2.3 Offer courses to everyone? Open courses
If you make your course publicly accessible, it is generally open to anyone via the Internet (i.e. also to people from outside the academy). If you promote your course, you will reach more potential participants. Interested parties can then simply register for the course and attend it directly. When you register for the first time, you create your user account with your e-mail address. The enrollment form can be modified on request (e.g. to also ask for the participant’s address).
2.4 Offer paid courses? eCommerce
Like an open course, anyone can register for a course offered in the store. The difference here, however, is that the content only becomes available when a predefined course fee is paid successfully. This course enrollment option is particularly useful if you want to sell your eLearning courses to customers.
To be able to offer paid courses, go to Options > Shop, and activate the checkbox "Allow paid courses". Then enter the API data either via PayPal (US provider) or Mollie (EU provider).
Payment on account
You also have the option "Pay on account - allow customers to register without immediate payment". Below, it is possible to enter an e-mail address to which information about the purchaser of the course should be sent. The invoice will then be created by your accounting department.
Video tutorial
This video tutorial shows you how to invite participants in Coursepath. All course enrollment options are explained in this video tutorial:
Tutorial: Invite participants (more tutorials on the Coursepath YouTube channel)
Conclusion
There are multiple ways to enroll on a course on Coursepath and a suitable method can be found for every area. You don't have to commit to a single method per course; You can combine different methods and also return to the settings later and change them. Participants can either be invited to individual courses or to the entire academy.
When they log on for the first time, new users must choose a secure password for themselves and can then access the content that is released for them