Hybrid forms of eLearning and on-site training play a major role in many companies. Blended learning combines the advantages of online self-learning with live (on-site) courses.
While eLearning can often simplify planning of training courses, face-to-face courses or online workshops are particularly suitable for responding to questions from individual participants or to practice using machines, for example.
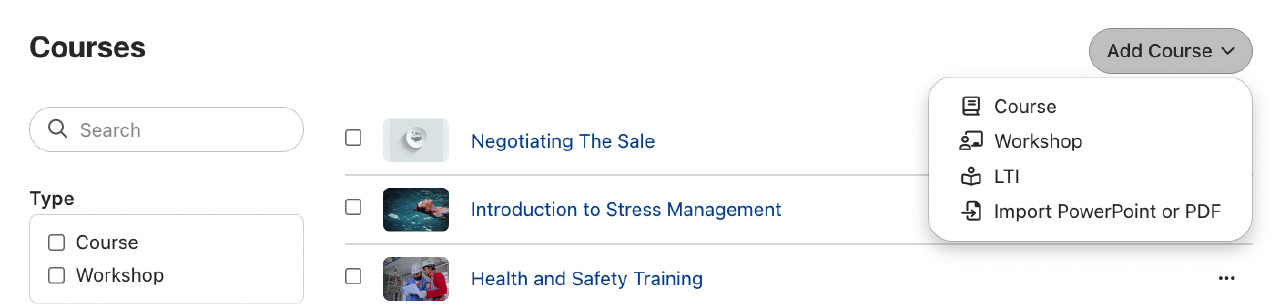
Setting up a workshop
You can create a new workshop under Options > Courses > Add course > Workshop.
 When you set up a new workshop, the first thing you see is the name and description. You can enter a heading, a sub-heading and a detailed description and agenda for the workshop, as well as choose an image and a banner. Just like for courses, this information will appear later on the info page of the workshop.
For workshops, the table of contents is hidden by default - if necessary, you can display it via the course options. This is useful, for example, if you want to conduct a test (with a certificate of completion) before or after a workshop.
The difference between courses and workshops
When creating the workshop, select the checkbox "This is a workshop with scheduled dates". This setting turns the course into a workshop and you are required to enter the period. This workshop can now also be selected in widgets.
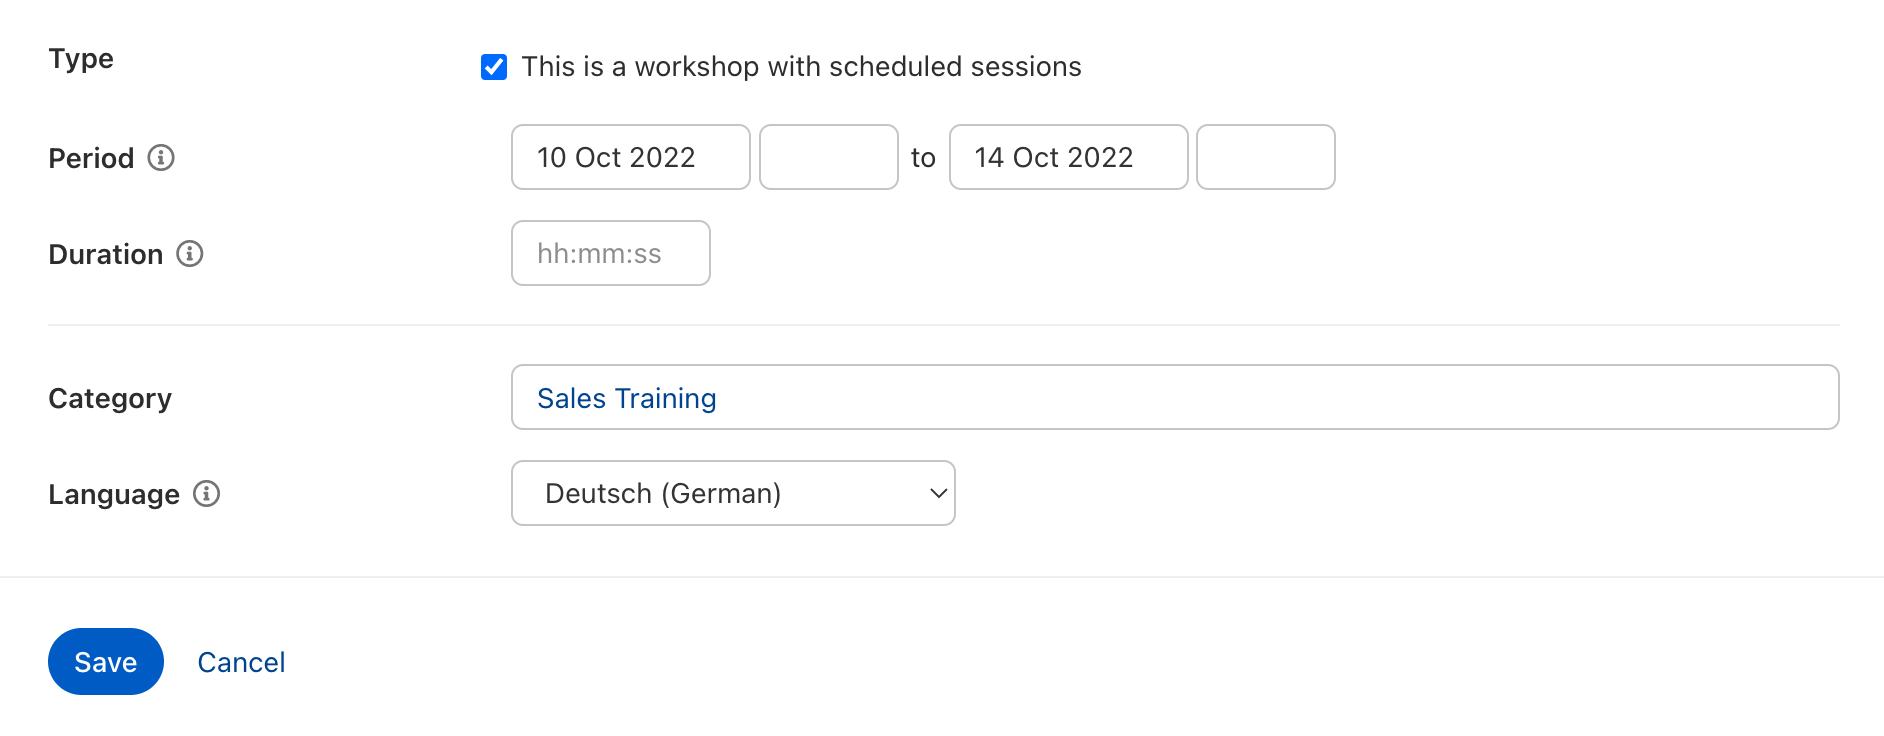 It is also possible to select (multiple) categories and a language for the workshop.
After the general setup, you will see the following:
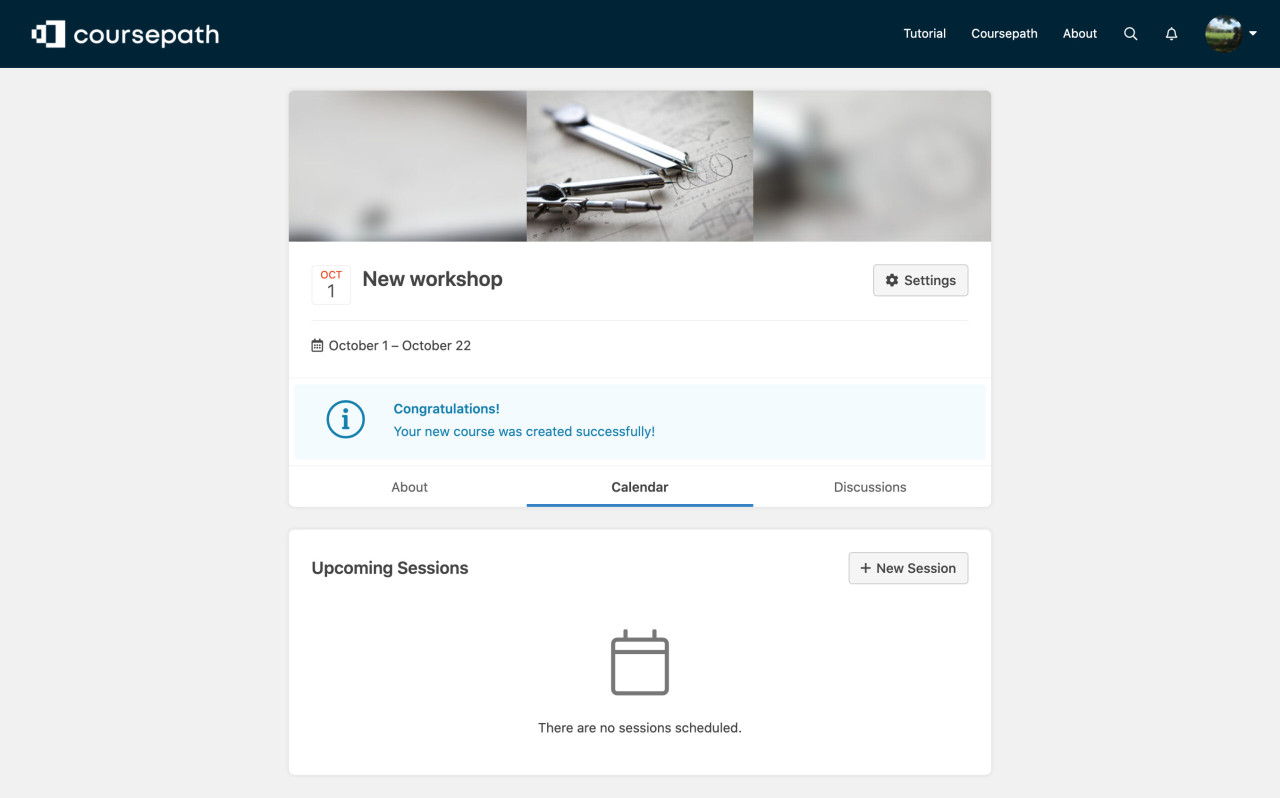 Via the Calendar menu, click "+ New Session" to schedule your workshop session(s). This opens a new page where you can enter detailed information regarding the session. Start with the title and date. Please note that the date is required but the time is not. If the time is not entered, it is automatically set to the start and end of the day (00:00 or 23:59).
Links to online meetings
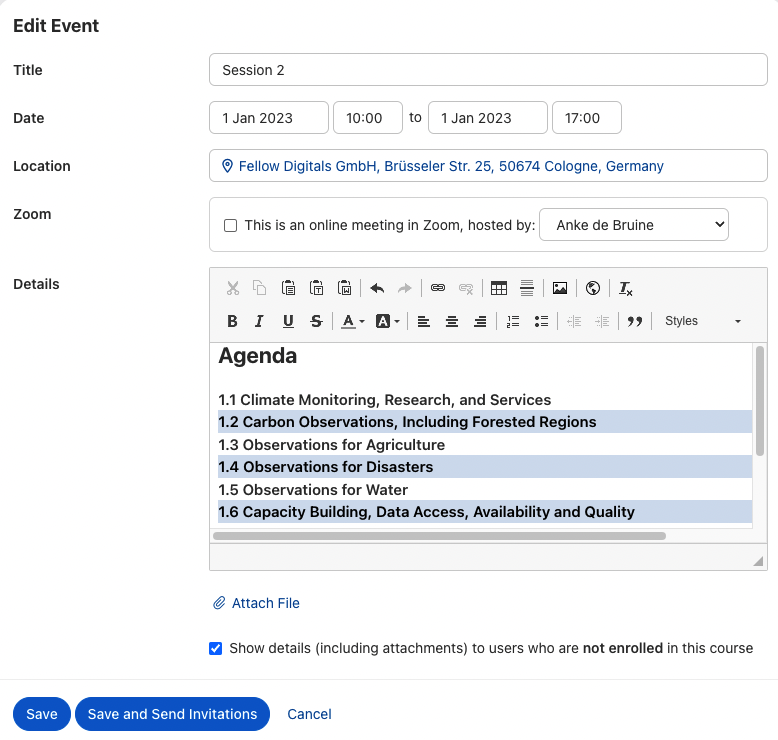
Workshop dates can have a physical address or a Teams or Zoom meeting URL, for example. If desired, you can also include any other links here.
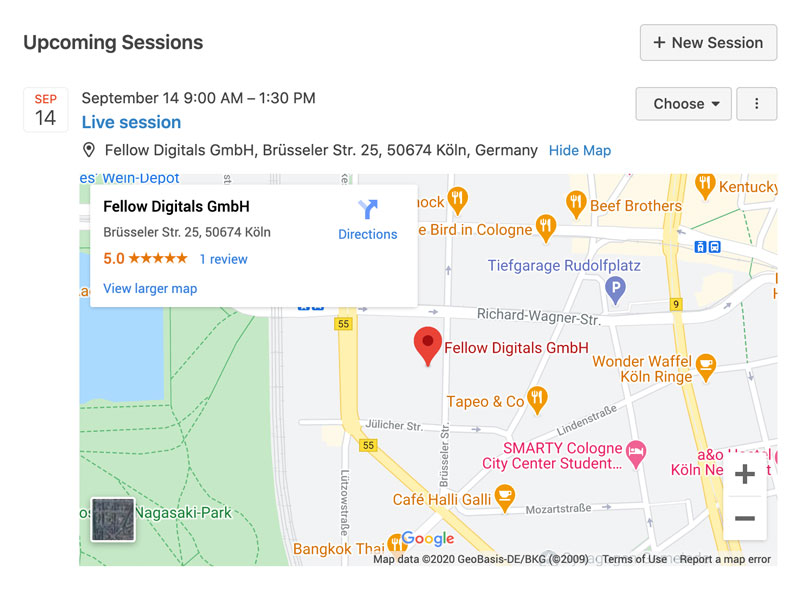
When you enter a location, you can the participants will be able to see the location on a map later on. As with general courses, if you have integrated Zoom with Coursepath, you can also set up the workshop session as a Zoom meeting.
Session details
In the “Details” field, it is possible to provide further information about the workshop session (e.g. the agenda). It is also possible to upload specific material for each session in various data formats.
Workshop visibility
Selecting the checkbox “Display session details (including attachments) to users who are not enrolled on this course”, makes the corresponding session visible for non-participants. This means people can see the scheduled sessions even before they register for the workshop.
Click the “Save” button to save your session. Clicking the “Save and send invitations” button will also send calendar invitations to all workshop participants. Participants can then enter this session in their personal calendars.
- Creating a new workshop
- Name and description
- Sessions
Workshops from the learner's point of view
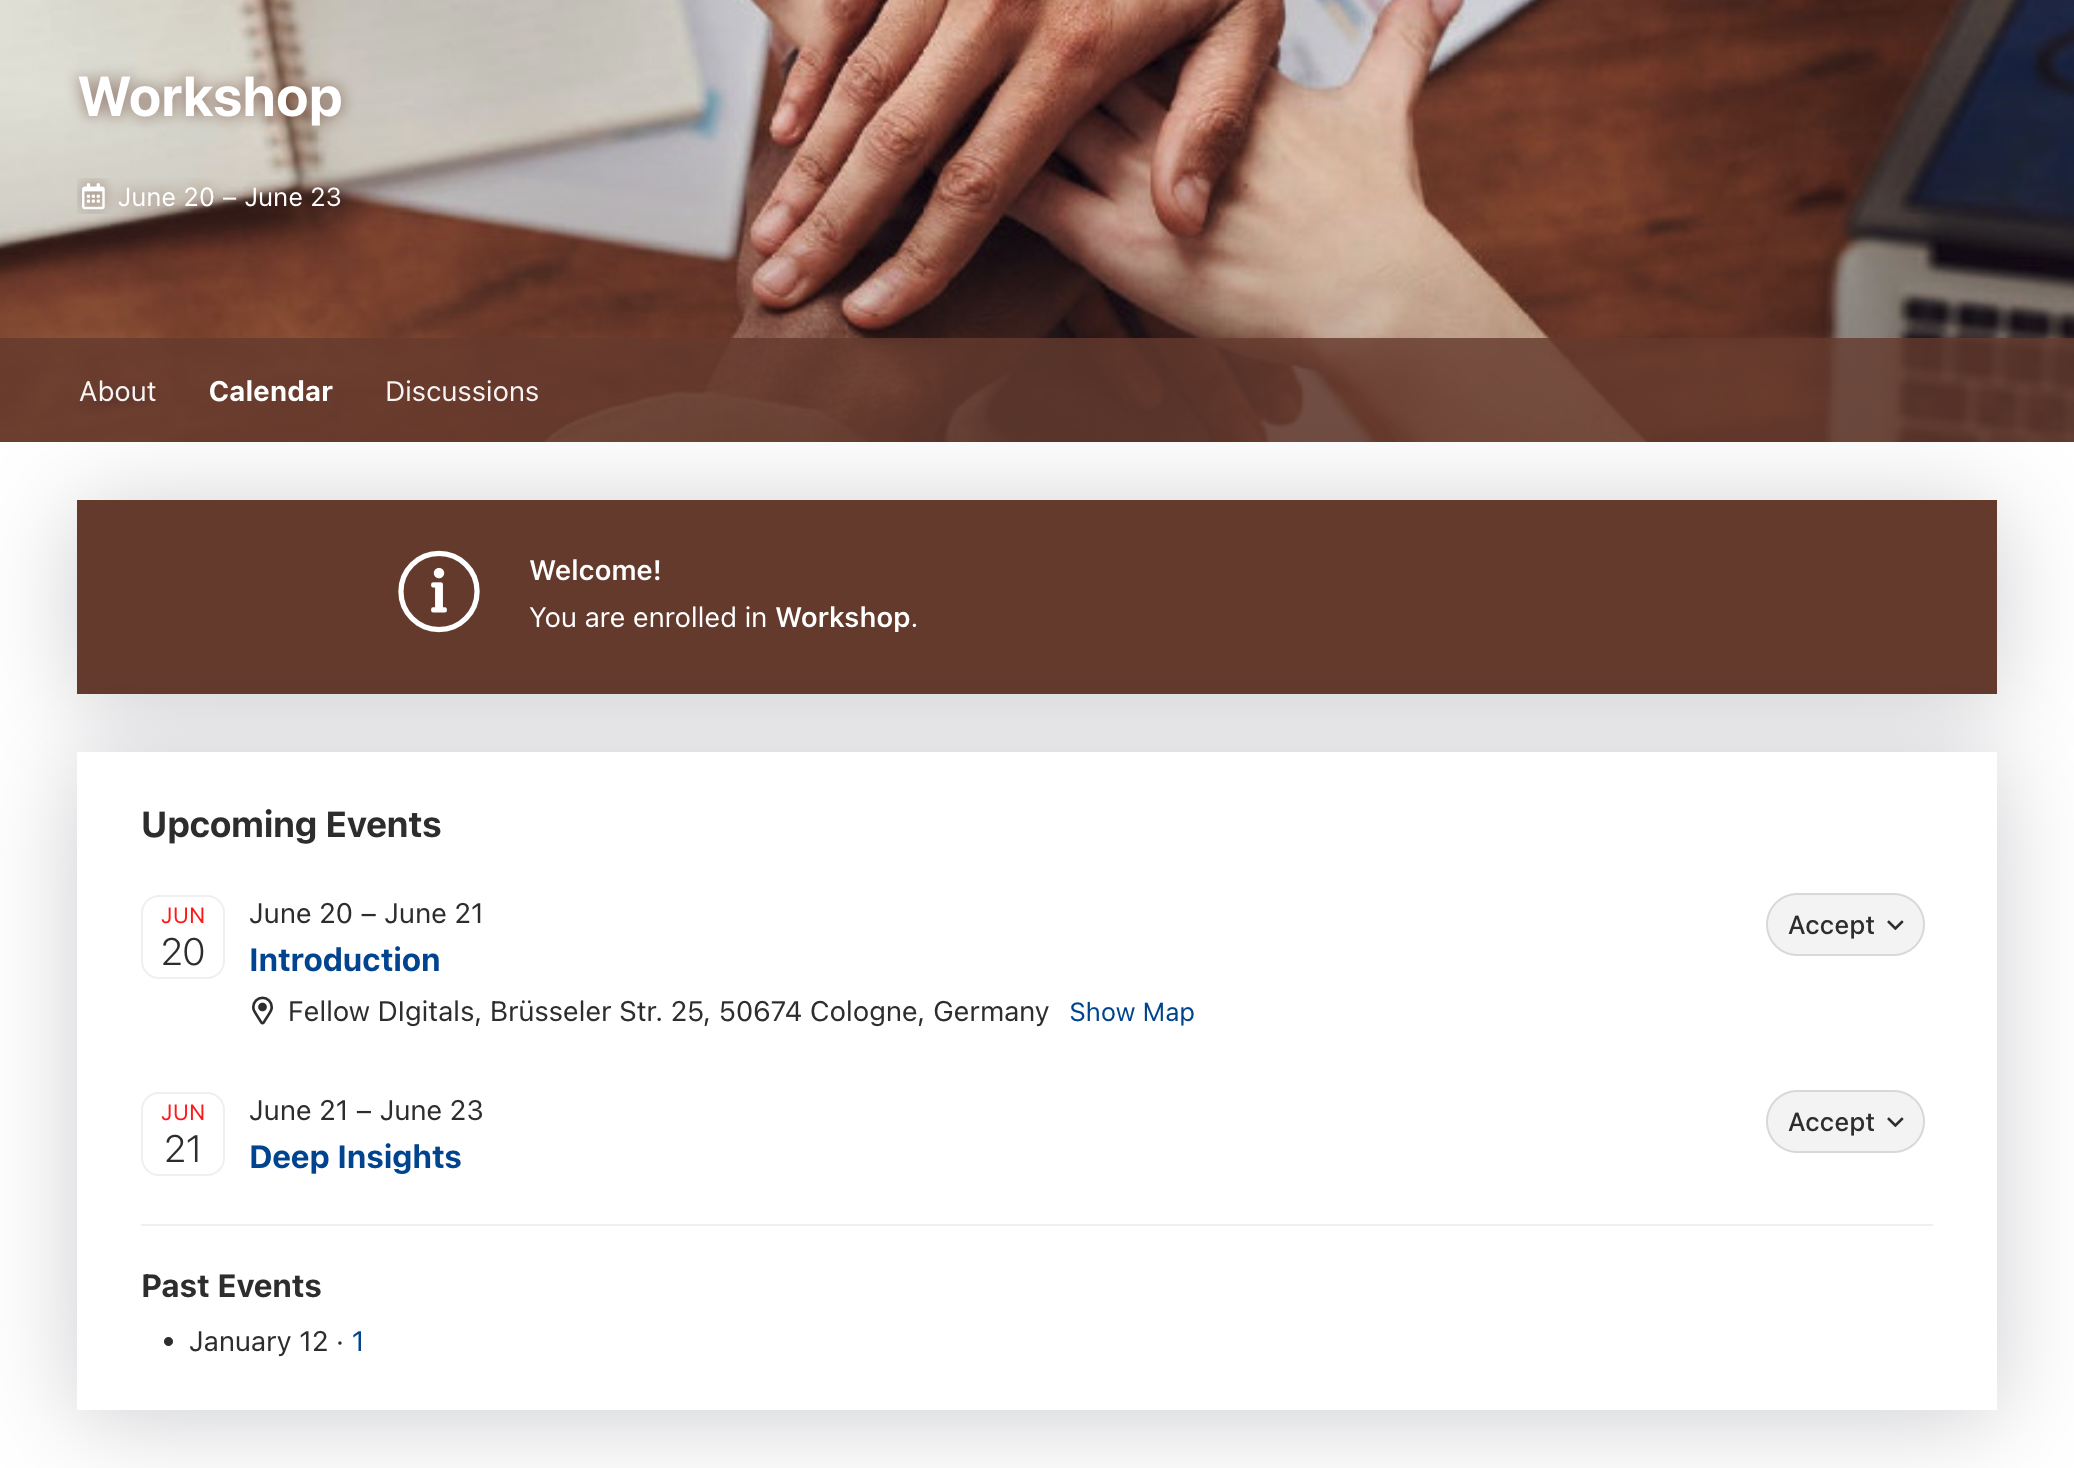
Just like with courses, the info page of the workshops gives participants and prospective participants an overview of the workshop. Depending on whether sessions are visible to non-participants, the calendar displays those sessions in the workshop overview. Sessions are always displayed to the workshop participants.
 They can accept or decline the invitation directly in the e-mail. Alternatively, it is possible to call up the workshop in Coursepath and accept or reject it directly in the LMS after checking it against existing sessions.
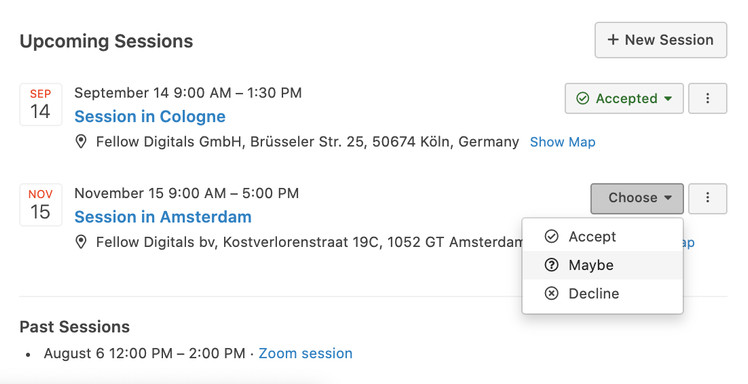 Accepting or declining (either via the invitation or directly in the workshop in Coursepath)
Workshop management
The default workshop setting is for the table of contents to be hidden (i.e. not displayed as a standard menu item). If you want to display a table of contents, you can change the display settings in the course/workshop settings at any time.
Workshop registration, certification, etc. works the same as for standard courses. This also means that workshops appear as courses in reports.
Passing a workshop
By default, participants can only pass the workshop via a manual setting by a trainer.
Alternatively, you can display the table of contents in the course and conduct a test before and/or after the workshop. This makes it possible to define a minimum number of points to be achieved and to allow participants to pass automatically.